Pages

Friday, September 23, 2011

What You Missed While I Was Gone.

I might have jumped off the proverbial blogger cliff, but I didn't stop for a second in the real world. So here are a few things you may have missed while I was gone.

I alluded to outdoor change in this blog post, but never got around to telling you what we did.
We bought retaining wall bricks or stones (what-ev) and we Adam dug around the tree in our front yard and stacked 'em up. Looks ten times better, never mind the fact that we ran out of money steam and didn't complete the backside of the tree mound. From the front it looks AWESOME. Yeah. pretty exciting stuff. So exciting in fact that we decided to do the same thing to the front (in front of the basement windows) and around our walkway to the front door.
This will have to come next year I think.. we've already moved on. Darn that ADD!  Can't see anything through to fruition. (I think that might have been written on a report card once in my life..I had a bit of deja vu writing that last sentence.)

Before (when we first saw the house): 


Adam working hard on the project:


The AWESOME After: 


 Yep. There you have it. We've done a few more things around the house while I was gone. I have to update you on that later. More to come!


Thursday, September 22, 2011

Autumn Already, Where Did The Time Go?


Sorry I have been away for so long. School sort of sucks the will-to-blog right out of me. But, I'm back again. I have good news, I have again done excellent in school. Yes, I just did a virtual pat on the back...to myself. What can I say, I'm proud.

So I'm learning the basics of design and just finished a class on Layout. So if you don't know what that means (mom) here it is simplified: Basically it is the arrangement of 'whatever' to a pleasing affect.

Example: A magazine has words (articles) and pictures arranged on a piece of paper. The layout of these words and pictures is very important, so the viewer/reader can understand what an article is about. It also will grab the reader's attention and entice them to read the article (or look at the pictures). The layout must be clear and easy to read.

Another example would be website layout: A person or client might go to a company's website to purchase something or to find directions/ information. If the website is cluttered and the client doesn't know where the information is or cannot find the product, then most likely they will leave the site and that company has lost business. The worst possible layout design for a website would be where there isn't a logo or company name clearly labeled:  the client would open the website up, but the site isn't clear whether or not this is even the right company.

The class was fun and informative, but made me think about my (neglected) blog and I wondered if I would be able to use my new knowledge of layout software on it. Unfortunately I only know the design side and haven't learned how to implement it yet. Since I'm impatient I've recently started looking into how to change the design of my blog, only to discover that I know... NOTHING! Ahh.
It seems that I know less than the average person. Which is shocking to me since I thought I knew a little bit more than the average joe. Apparently to make a blog or website better you must use HTML or CSS... ( of course I had to look up what the heck those things mean). I now know that HTML and CSS have something to do with the computer. ...yep thats all.
I read wikipedia, blogs and googled my heart out only to understand a bunch of gobblety-gook that told me nothing about what it really was. All I understood was that it was hard to understand.
So I'm in a slow, very very slow, process of trying to understand coding. (which is what wikipedia told me HTML and CSS is, haha)
I've decided that I can't be the only person who is as clueless as I am, so I've decided to update what I learn through the process of changing my own blog. Hopefully it will help someone 'out there' who maybe needed it  wanted to know how to do it too.

Friday, May 13, 2011

Spring Has Sprung

Spring is here at Bright Little House! We've started planning our landscape and we are soo excited!
We are going to be adding retaining walls around the front and we will finally be adding much needed shrubs and flowers to the front yard. The backyard will be cleaned up and hopefully we can purchase some patio furniture.
I am going to be searching Craigslist.com and yard-sales for deals on the furniture.

Here are some retaining walls, we used these for ideas:


                                                  (unknown source)

                                                      (unknown source)

Of course I wish our walls will look like this, all grown in and lush:

(http://www.anchorblock.com/assets/ProductRotate/pd_windsor2.jpg)


And these are some of the flower/shrub ideas we've had:


(http://www.gardensablaze.com/Landscaping/IslandBedPerennials2.jpg)

(source unknown)

I dream:

    (http://www.cleanme.us/wp-content/uploads/2011/04/perennial-plants.jpg)

         (source unknown)

(http://www.marjoriesgarden.com/images/5.jpg)

                              (unknown source)


So here's a look at where we began:

The Before:

The During, (last year):

This week:

(unfortunately those bushes we transplanted from elsewhere didn't live once the Georgia sun started to get summer hot...so we'll have to buy more bushes for the front.)
Soo..
Next up....The beautiful AFTER...

Saturday, April 2, 2011

Hanging Up

We've finally have blinds! Yay. We knew we would buy nice wooden blinds eventually, but since we still have to replace all the windows in the house, we decided buying expensive blinds first wouldn't be the best choice for us. We know we are widening a few of them so they wouldn't be the same size.
But, we needed something up for privacy and to let the light in since the curtains darken the rooms and I can't stand it. I like light! A lot!
So, Adam had a great idea, while at Home Depo he noticed temporary blinds on sale for .10 cents.

(Temporary blinds are the blinds the store gives you to put up while you wait for your order of custom blinds to come in. They are a vinyl- like material and they stick to your wall, like a sticker.)
He bought a bunch of them. One or two for each window.
Temp blinds look very nice (compared to sheets :-D) and they filter light beautifully. Best cheap idea yet. We love them and I'm so happy Adam bought them. It really helped our house feel more complete. We were both getting sick of the multitude of curtains. I think curtains should be for beauty and a little function, but not the only thing on the window. It gets to be too much. We felt like we were living in a cave enshrouded with fabric. If we wanted to open a window we had to dig through layers of fabric.

It is very simple to install temporary blinds. You just measure your window, then measure your blinds and cut off any remaining length:


Then you stick-em to the wall.

After we installed the blinds in the kitchen we both stepped back and found that it didn't look right.
I had the idea that perhaps they should be hung higher up- like to the ceiling- and it worked! The blinds looked much better.


Then the next thing on our list was to hang the Target frames that I saved up for, but never found the time to hang. I fell in love with these simple white frames and I knew just where I wanted them.
We taped the paper backing to the wall first for placement (to make sure it was where we wanted them before we put holes in the wall):

Then after we hung the frames, I filled them with artwork from school. I still have to recieve another piece of artwork from school to fill the bottom frame in the picture below, so in this picture it is just the cardboard back to the fram showing:
After learning that it might be awhile before I get my artwork back (it is on display in the hallways at school) I decided to put something pretty in its place. I then cut a piece of fabric to fit inside the frame and hung it up:

I actually LOVE it! I just might have to hang it up else where when I have my artwork back.
In this picture below I have switched the bottom and top frames, so the fabric is on the top:

I really love this wallpaper from Anthropologie, but I can only take small doses of so much color, so I'm thinking about hanging some of the wallpaper here behind the shelves (once we get around to adding them..so far we only have one shelf up!) for a pop of color. You can see a sample of it here on the wall behind the cookbooks:

AND we finally hung up the diningroom mirror. Although it isn't as big as I had hoped it would be, I'll find some way to fill in around it. Maybe I'll hang two giant black frames on either side of the gilded mirror? We'll see...


Sunday, March 27, 2011

Dining Room Chair Makeover


When we first bought Bright Little House we didn't have any furniture, so anything anyone could give us was a BIG help. Fortunately our parents gave us a dining room table as a housewarming present. Unfortunately, we didn't have any chairs. I don't know if you know this, but chairs are ex-pennn-sive and our budget was F-R-E-E. So, we went yard sale-ing as soon as we could. We hit the jack pot and bought a grandma's whole garage full of stuff for about $75.00. That included a sofa and love seat, two reclining wing-back chairs, 6 dining room chairs, 6 kitchen table chairs, a mid-century modern night stand, and a mid-century modern sofa table. The dining room chairs were a match for the table, but they weren't a match for our taste and they really needed a makeover!

Thanks to Jo Ann Fabrics' coupon in the mail, we headed to get some new fabric for 20% off any purchase.

(Well, it was more like, I went to the mail box, saw the coupon, had a light bulb moment, and proceeded to plan till Adam got home from work; then begged tried to persuade Adam that it was what HE really wanted while jumping up and down with coupon in my sweaty fists.)

We knew we wanted to paint the chairs white and we weren't sure yet on any particular color scheme for the house. So, we decided a neutral color that would go with any color would be the best decision.
Once we were there we headed to the Clearance section and pulled out anything that looked good, then we eliminated any fabrics that were too thin (which left us with all the higher priced 'Home Decor' fabrics). We couldn't decide on our favorite two fabrics. One was a tan linen and the other was a very pale grey (more like a grey-white). Since we were pretty sure we wanted to paint the walls grey we went with the light white-grey fabric. Turns out that the other fabric didn't have enough yards for our project anyway, so the grey was a no-brainer in the end (once we got it home we saw that it actually almost matched the white painted chairs. Which made a beautiful monochrome look; which we liked better than what we thought the grey would look like.)

Since the fabric was on clearance and we had a 20% discount thanks to our mail coupon, we were able to afford this little makeover. Yay!
So, with roll of fabric in hand we headed off to Home Depo to purchase a few cans of High Gloss white spray paint. Which was free thanks to Adam's gift card.
Thank you baby for spending it on me and my crazy spur of the moment ideas.

So, with out further ado...

Here are BEFORE shots (from Halloween):

Alex Kitty

Here are shots of the cleaning process:


I used an old bucket filled with warm water, a drop of dish soap, as well as, a tiny sprinkle of OxiClean (for good measure). To scrub, I had old car cleaning brushes and I scrubbed the heck outta those chairs. ( I had to be gentle around the rattan parts because they are delicate and warped a little when wet- but they straightened back out when they dried)


Adam removed the old fabric from the seats and stretched and stapled the new fabric on.
There was three layers of old fabric under those chairs, the last one was lime green crushed velvet..it was pretty yuckie.

After painting white:

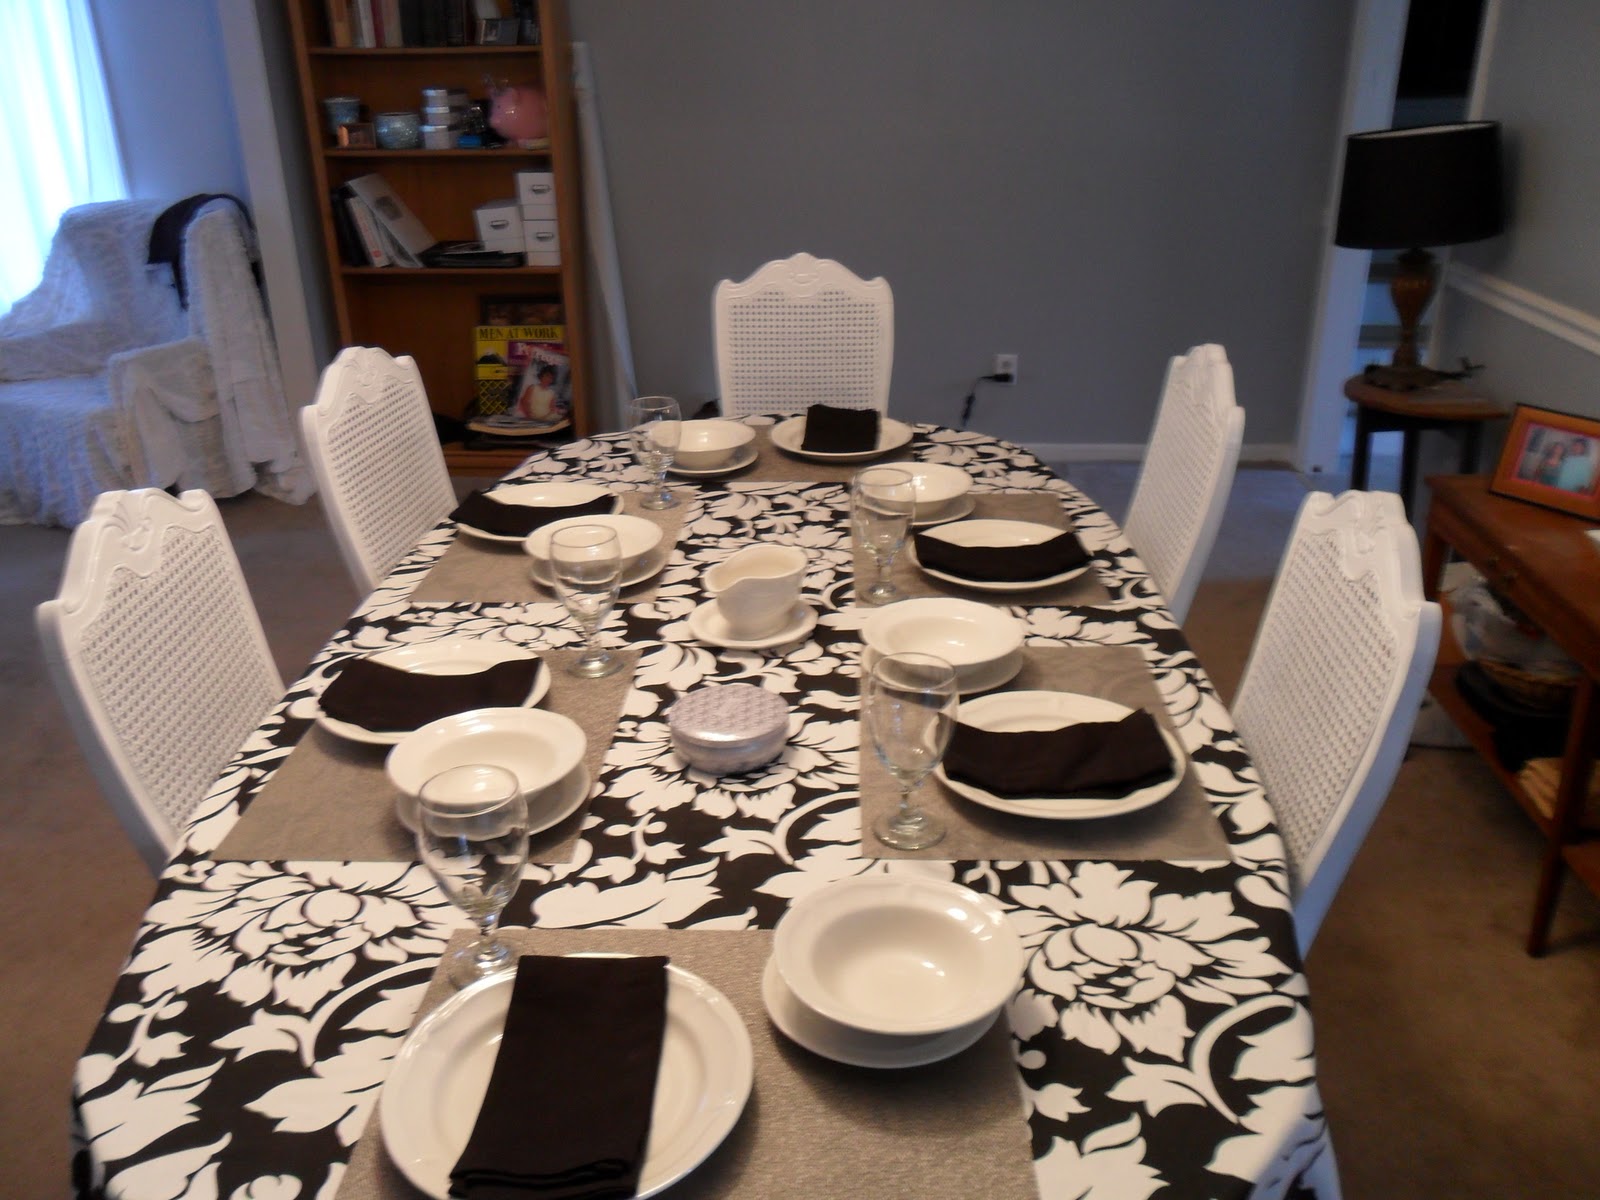
With re-upholstered fabric:


With the gold napkin rings:


The dining room is still in progress..we will paint the walls (again, that color was oops paint bought at Home Depo just in time for our Thanksgiving guests), buy a buffet table, rug, lamps, hang the mirror and some art, and well, we want to eventually get new carpet. We originally wanted wood floors, but since this home will be rented out in a few years while we're away in college in another city, we decided carpet is the easiest to replace if the renters ruin the floor.

* The napkin rings are from Pier 1, the table cloth was purchased at Home Goods (the pakaging said Badgley Mishka), the napkins are Target, the glasses are Wal-mart (water glasses) as well as the gravey bowl, and the dishes were bought at Goodwill, but they say Thomson Pottery on the bottoms.